Greetings and welcome back to a brand-new blog post. In this post, I'll demonstrate how to build your own Apache web server in Termux. Web servers are the foundation of the World Wide Web, and they've made the internet available to everyone. I'll walk you through installing Apache2 in Termux and demonstrate how to use it to practice HTML.
We will discover how to configure Apache web servers on any Android device in this article. We must install the Termux app from the Play Store in order to do this. Termux is a Linux program that functions as an Android terminal emulator and doesn't require setup or rooting. With Termux, the user has access to a shell that resembles Linux from which they may run scripts and commands. To install software, Termux offers the pkg and apt package managers, which function similarly to apt and other Linux package managers.
What is Apache2 (In Termux)?
Web content is delivered over the Internet by the Apache HTTP Server, a free and open-source web server. After its creation, Apache, as it is often known, rose to prominence as the most widely used HTTP client online. Although it was clarified in 2000, the general consensus is that Apache's name originated from its development history and method of improvement through the application of patches and modules. It was discovered that the Native American tribe gave it this name out of respect for its tenacity and fortitude. We should first go over what a web application is and the conventional architecture that is often found in web applications before delving too deeply into Install Apache2.
Since termux is a Linux terminal emulator, we can use it to run the Apache web server. Apache is quite simple to run on Linux. Fundamentally, installation and use are quite easy. With Temux, you can use HTML to design your own website, which you can then host on your Temux Apache2. This server will operate on port 8080 on your local host by default, but you can force it to run by using port forwarding.
What are the benefits of using Apache Servers?
Since Apache2 is regarded as open-source software, anyone can see and work with the original source code without restriction. Due to the fact that Apache is open source, many developers have developed and customized their own modules to leverage particular capabilities and improve the fundamental functioning of the program. Since its launch in 1995, Apache has been the key technology that has facilitated the rapid expansion of the Internet throughout its formative years.
To manage high traffic volumes, load balancing, server side programming support (PHP), and SSL setup are some of the most often added modules. Additionally, Apache can be used with Windows, Linux, and macOS. You can operate Apache2 on Windows and Mac if you know how to configure Apache on Linux. The installation procedures and directory locations would be the only differences:
Step 1: Download the Termux app
First, on your Android phone, launch the F-Droid.org website or app.
Look for the Termux application.
After that, hit the Download option to install it on your Android phone. The file will download to your phone.
Note: Since you downloaded it from the Google Playstore, which is where you obtain all of your apps, it is secure.
Step 2: Install & Setup Apache2 Server In Termux Terminal
Use the commands listed below to install Apache2 on your Termux computer:
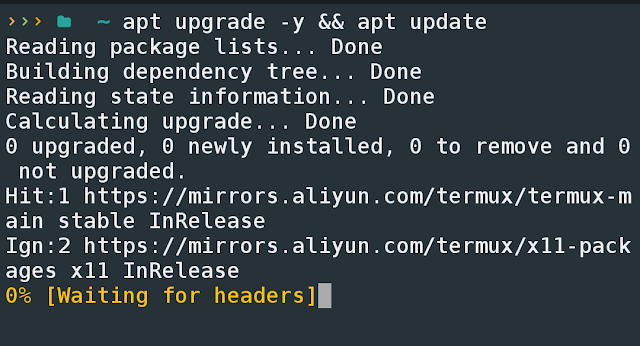
Open the Termux program after installation is finished, update the packages list by typing "apt update && apt upgrade –y," then hit Enter.
apt upgrade -y && apt update
The core apt command can be used to install apache2, which is a core package in Termux. Installing Apache2 server won't take long because the Termux archive file is only 5.5 MB in size. To install, type the command shown below.
apt install apache2
Step 3: Start and Stop Apache2 Server
The apache2 termux server will configure itself automatically. To test the server, simply type the following command. The below command will restart the Termux-Apache server whenever you choose to do so. This command starts the Apache server.
apachectl
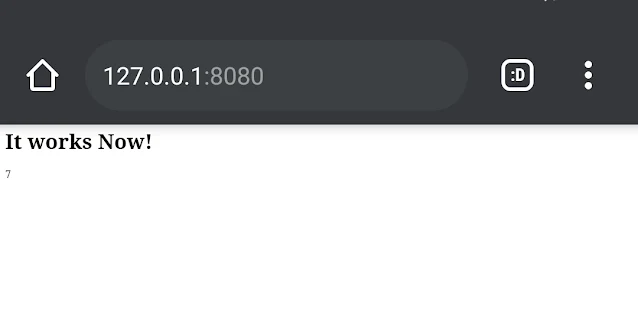
You should see the message "It Works" (don't worry I edited my to it works now in the image), when you open your browser and navigate to localhost:8080 or 127.0.0.1:8080. This indicates that your Apache server is operating error-free.
A single line of code in termux can be used to terminate the Apache2 server. This command will cause Chrome to say "This website is not available" when you refresh your page; if this happens at any point, your server is down.
When an Apache server is active, type the command:
apachectl -k stop
Step 4: Edit and Upload index.html file To Apache2 Server
The HTML file we receive on localhost is actually present in your Termux, and you can edit it using Learn HTML in your Termux now that the web server is up and operating. You must first figure out how to alter this page so that you can print your name in place of her creations.
In Termux, the usr/share/apache2/default-site/htdocs folder contains all of the apcahe2 webserver files. and in order to update the Index.html file that is contained there, you must first navigate inside that folder. Using the command below, travel to the htdocs location. You may view the index.html file in the htdocs folder by typing ls.
To remove the default page served by Apache, navigate to the directory
cd /$PREFIX/share/apache2/default-site/htdocs
You can add new HTML files to the htdocs directory or use any text editor, such as Nano, to change the ones that already exist.
Additionally, you can link your HTML files together by adding anchor tags to them. You can, for instance, change your index.html homepage before building other webpages and connecting them to your index.html.
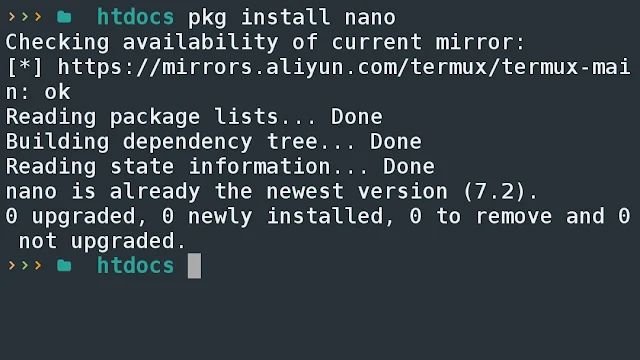
You can skip this step if you already have a text editor installed in Termux, but if not, you should install one. Nano is a decent and lightweight text editor. Utilize the command below to install Nano in your terminal.
pkg install nano
You can now view the source code of the default HTML Apache2 website by entering the command below.
nano index.html
You can alter or modify this page if you have a basic understanding of HTML coding! include your name in a text
Step 5: Change Apache Server Folder to /Scard
Use the command below to change Apache's default Server Folder location.
You must move share/apache2/default-site/htdocs to the internal storage on my mobile device. I've set myself up on /sdcard/web numerous times.
Make a directory out of the internal storage of your phone.
mkdir /sdcard/web
Navigate to the Apache Configuration Files Folder.
cd usr/etc/apache2 /data/data/com.termux/files
Modify the configuration files for Apache
nano httpd.conf
Scroll Down and Find this Document Root Line and Change Folder Location
The directory from which your documents will be served is called the document Root. All requests are handled from this directory by default. You can use aliases and symbolic links to point to other locations.
Directory "/sdcard/web/"> Document Root "/sdcard/web/"
"None", "All", or any combination of these are possible values for the Options directive.
After Change Type CTRl + X and type Y .save file to do that, launch your file manager, select Web Folder, and upload your HTML file to your web folder.
Step 6: Change default Port of Apache2 Web server
We occasionally need to adjust the port on the Apache server. The Apache web server's default port may need to be changed for a variety of reasons, including security concerns or the fact that port 80 is already being used by another piece of software. Here, we'll look at how to modify the Apache web server's default port on an Ubuntu server.
Modify the ports.conf file on Apache.
Use any editor to open /etc/apache2/httpd.conf.
cd usr/etc/apache2 /data/data/com.termux/files
Modify the configuration files for Apache
Nano httpd.conf
Find line number 52.
Set port 8080.
Enter the required port number in place of 8080, such as 4444 or your choice
ports as opposed to the standard. Refer to the guideline as well.
To stop Apache from glomming onto all bound IP addresses, change this to Listen on particular IP addresses as indicated below.
Listen to 12.34.56.78:80. Which is on Port 8080.
After Change Type CTRl + X and type, Y save the file
Conclusion
This is how to use Termux to run the Apache2 web server on an Android handset. Also, you may use ngrok to get your Apache server online so that anybody with an internet connection can view it. Please feel free to watch my video on it if you are stuck someplace.
One fantastic piece of software for setting up a web server on your Termux is Apache2. Since Apache2-termux is your personal web server, you are free to do as you choose. Here, you can practice with HTML code. To select your site, try making many web pages and linking them to the index. Make sure you connect back to the index so you can click the link to return to the index page. This is the finest resource for learning about servers and websites if you take your studies seriously. You can reach me at any time if you need assistance with anything related to this.
Enjoyed this post? Never miss out on future posts by «following us»


![How to Install And Use Apache2 Server on Termux Android[UPDATED METHOD]](https://blogger.googleusercontent.com/img/b/R29vZ2xl/AVvXsEiDU7mjSRPNU7QhMQPDKnyde-UhEIZt4nR5amElQa6adhP3lZi4cG2ICJalboB85bLWpKzsAU-pNiUV4kZcoxBH98mUTrxidGmrBTFEb2QjVlwvniN81iKJv2IQpXicSwLpH7uG1j74QiBi/w200-h200-p-k-no-nu/1701422051990122-0.png)